 Zum Inhalt springen



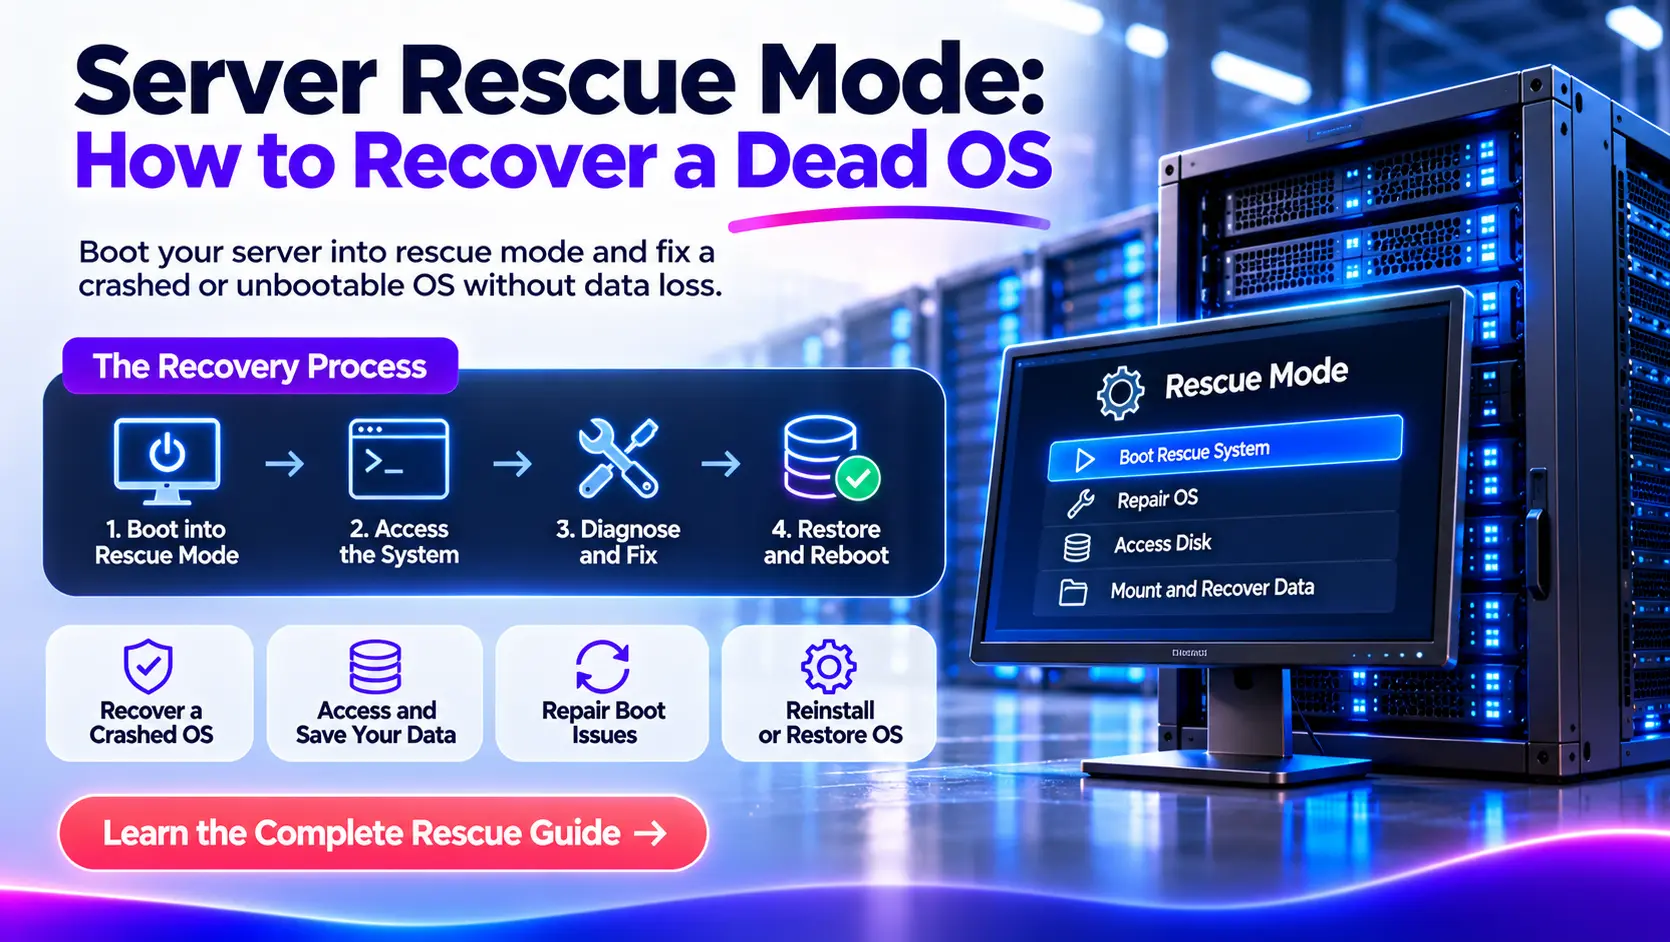
A server that suddenly stops booting can take your website, applications, databases, and business services offline. The problem might be a damaged bootloader, a failed operating system update, a filesystem error, or an incorrect storage configuration.
Fortunately, an operating system that fails to boot does not always mean your data is lost.
Server rescue mode lets you start a temporary operating system, access the installed server disks, diagnose the failure, and attempt recovery without immediately reinstalling the OS.
The safest recovery process starts with identifying the failure, protecting important data, and selecting the correct repair. Once the problem is fixed, you can return the server to normal operation and verify that its services work correctly.
In this guide, we explain how to recover a dead Linux operating system using rescue mode, including the commands, precautions, and recovery methods that matter most.
What Is Server Rescue Mode?
Server rescue mode is a recovery environment that allows administrators to troubleshoot a server when its installed operating system cannot start normally.
Instead of loading the damaged operating system, the server boots into a separate recovery environment. This environment provides tools to inspect disks, access files, review system logs, and repair certain boot or configuration problems.
For example, suppose an Ubuntu dedicated server stops booting after a kernel update. The normal operating system cannot start, so SSH access is unavailable.
By starting an independent rescue environment, an administrator can inspect the installed Linux system, identify the failed update, and repair the affected components.
Depending on the hosting platform, rescue mode may be available through network boot, recovery media, or a provider-managed recovery system.
What Can You Do in Server Rescue Mode?
A rescue environment can help you:
- Access files when the installed Linux OS fails to boot.
- Investigate damaged or missing boot files.
- Repair supported filesystem errors.
- Correct incorrect disk mount configurations.
- Troubleshoot kernel and initramfs failures.
- Recover configuration files and application data.
- Inspect RAID arrays, logical volumes, and partitions.
- Back up important files before reinstalling the OS.
- Restore access to a server after certain configuration failures.
However, rescue mode does not automatically repair a server or guarantee data recovery.
You still need to identify the failure and determine whether the storage hardware and filesystem are healthy enough for repair.
Server Rescue Mode vs Linux Emergency Mode
The term “rescue mode” can describe several different recovery environments.
| Recovery method | How it works | Best use |
| Provider rescue mode | Boots an independent temporary operating system | Recovering an installed OS that cannot boot |
| Linux rescue target | Starts a minimal environment from the installed system | Troubleshooting system configuration problems |
| Linux emergency target | Loads a very limited recovery environment | Investigating serious startup or mount failures |
| GRUB rescue shell | Opens a limited bootloader command interface | Troubleshooting bootloader problems |
| Remote console | Provides screen and keyboard access to the server | Viewing boot errors and diagnosing failed SSH access |
These recovery methods are not interchangeable.
For example, a Linux rescue target still depends on important parts of the installed operating system. An independent provider rescue environment can remain accessible even when the installed OS is damaged.
Rescue Mode vs Remote Console
A remote console and a rescue environment serve different purposes.
A remote console, such as KVM-over-IP, IPMI, iDRAC, or a virtual machine console, lets you observe and control the server directly.
Rescue mode provides an alternate operating environment containing diagnostic and recovery tools.
If SSH stops working, check the remote console first. The installed operating system may still be running normally, and the problem could involve networking or SSH configuration rather than a failed boot.
Why Does a Server Operating System Stop Booting?
Linux servers can become unbootable for several reasons. Identifying the cause helps prevent unnecessary changes that could make recovery more difficult.
1. Bootloader Failure
The bootloader starts the process of loading the operating system.
Many Linux distributions use GRUB to locate and start the Linux kernel.
If GRUB files, configuration, partitions, or boot entries become damaged, the server may fail before Linux starts.
Common symptoms include:
- A GRUB rescue prompt.
- A missing operating system message.
- A boot device error.
- A failure to locate the root partition.
Bootloader failures can occur after partition changes, incorrect firmware settings, or interrupted updates.
2. Corrupted Filesystem
A filesystem organizes the files and directories stored on a disk.
Unexpected power loss, storage faults, software errors, or interrupted writes can leave filesystem metadata inconsistent.
An affected server may display filesystem errors, fail to mount its root partition, or enter emergency mode.
The correct recovery method depends on the filesystem type and storage condition.
3. Failed Kernel or Operating System Update
The Linux kernel manages core functions such as hardware access, memory, processes, and storage drivers.
A failed update can leave the server with a missing kernel image, damaged initramfs, or a configuration mismatch.
The server may show a kernel panic, fail to locate its root filesystem, or stop during early boot.
4. Incorrect Disk Configuration
Linux uses configuration files, including /etc/fstab, to define how filesystems should mount.
If a required disk is removed or its UUID changes, the operating system may fail while mounting storage.
Incorrect RAID, LVM, or encryption settings can produce similar symptoms.
5. Full System Disk
A completely full root filesystem can prevent services from writing important files.
If /boot fills up, kernel or bootloader updates may fail.
A full disk does not always make Linux unbootable, but it can contribute to failed updates and startup problems.
6. Storage Hardware Failure
Damaged SSDs, HDDs, storage controllers, or RAID members can make an operating system inaccessible.
Repeated I/O errors, disappearing devices, or persistent read failures may indicate hardware trouble.
In these cases, recovering data from healthy media or a verified backup is usually safer than repeatedly attempting repairs on the failing device.
How to Tell Whether the OS Is Dead or the Server Is Unreachable
A server that does not respond to SSH is not necessarily unbootable.
Before entering rescue mode, review its console output and identify where the failure occurs.
| Server symptom | Possible cause | Recommended first action |
| Server reaches login screen, but SSH fails | SSH, firewall, network, or authentication problem | Check network and SSH configuration |
| No bootable device found | Missing disk, boot order, or storage controller problem | Inspect firmware and disk detection |
| GRUB rescue prompt appears | Bootloader or partition mapping problem | Inspect the boot configuration |
| Kernel panic appears | Kernel, initramfs, or storage issue | Review error messages and installed kernel |
| Server enters emergency mode | Failed mount or required filesystem | Check filesystem and /etc/fstab |
| Repeated disk I/O errors appear | Hardware or storage failure | Prioritize data preservation |
| Server restarts continuously | Kernel, hardware, or startup problem | Record the console error and investigate |
Record the exact error message before attempting repairs.
Also check whether the problem started after a kernel update, configuration change, disk replacement, or unexpected shutdown.
Avoid repeatedly forcing the server to restart without understanding the failure. Repeated restarts can increase stress on damaged storage and may overwrite useful diagnostic information.
What to Check Before Starting Server Recovery
Recovery operations can affect important business data. A few checks before making changes can reduce the risk of permanent data loss.
Confirm Server Access
Make sure you have:
- Access to the correct server or hosting account.
- Permission to perform recovery operations.
- Remote console access when available.
- Rescue environment login credentials.
- Information about the installed operating system.
- Knowledge of the server’s disk and storage configuration.
- Encryption keys or passphrases if the storage is encrypted.
If you manage several servers, verify the server ID and target disks before proceeding.
Protect Your Data Before Repairing the OS
Create a recoverable copy of important data before making filesystem, partition, or bootloader changes whenever the storage condition allows it.
There are three common ways to protect server data.
| Backup method | What it preserves | Important limitation |
| File-level backup | Selected files, directories, and configurations | May not preserve the full boot environment |
| Disk image | A copy of an entire disk or device | Requires suitable storage and careful device selection |
| Provider snapshot | A point-in-time storage state | Availability, consistency, and independence vary by platform |
For a production server, verify that the backup contains the necessary application data, databases, configurations, and credentials.
A snapshot is useful, but it should not replace an independent backup.
If a disk is physically failing, stop unnecessary writes. A specialized imaging tool such as GNU ddrescue may help copy readable data to healthy storage before further recovery attempts.
Disk imaging requires careful source and destination selection. Writing an image to the wrong device can overwrite recoverable information.
Plan for Service Downtime
A server in an independent rescue environment generally does not run its normal operating system or production services.
This means websites, databases, email services, and hosted applications may remain unavailable during recovery.
For business-critical workloads, notify affected users and check whether a standby server or disaster recovery environment is available.
How to Recover a Dead OS Using Server Rescue Mode
The following steps focus on Linux dedicated servers. Many concepts also apply to VPS and cloud servers, although recovery access and disk attachment methods vary by provider.
The commands are examples, not a universal sequence to run on every server. Device names and repair procedures must match your actual environment.
Step 1: Boot the Server into a Rescue Environment
First, start an independent recovery environment.
There are several ways to do this.
Option 1: Use Your Hosting Provider’s Rescue Environment
Some dedicated server and VPS providers offer rescue boot options.
The typical process involves accessing your hosting management interface, selecting an available recovery environment, and starting the server with that environment.
The exact steps depend on your provider.
If your hosting platform supports network rescue boot, it may provide temporary login credentials or allow you to configure an SSH key.
After the server starts in rescue mode, connect using the approved recovery access method.
Zum Beispiel:
ssh root@SERVER_IP
Replace SERVER_IP with the actual rescue environment IP address.
Some providers use different usernames or authentication methods.
If your SSH client reports a changed server host key, verify the new fingerprint through a trusted provider channel or remote console before accepting it.
A changed key can be expected when booting a separate rescue OS, but it must not be trusted automatically.
Option 2: Boot from a Recovery ISO
If your server has a remote management console, you may be able to attach a Linux recovery ISO.
A common process is to:
- Access the authorized remote console.
- Attach a compatible Linux recovery ISO.
- Select the recovery media as the temporary boot device.
- Boot into the recovery environment.
- Open a terminal to inspect the installed disks.
Ubuntu, Debian, and other Linux installation or live environments can provide useful recovery tools, although their available utilities differ.
Option 3: Attach the Disk to Another Server
Some VPS and cloud platforms let you detach a storage volume and attach it to a compatible helper instance.
This can help when the original instance cannot boot.
Make sure the original instance is stopped or no longer writing to the volume before attaching it elsewhere, unless the platform explicitly supports safe shared access.
For dedicated servers, physical disk movement may require help from the hosting provider.
Step 2: Identify the Installed OS and Storage Layout
Once you enter the rescue environment, identify the disks and partitions before mounting or changing anything.
Start with:
lsblk -f
This command shows block devices, filesystem types, labels, UUIDs, and mount points.
A simplified example might look like this:
NAME FSTYPE LABEL MOUNTPOINTS
nvme0n1
├─nvme0n1p1 vfat
├─nvme0n1p2 ext4
└─nvme0n1p3 ext4
The example shows one NVMe disk containing three partitions.
| Device | Filesystem | Possible purpose |
| /dev/nvme0n1p1 | FAT/VFAT | EFI System Partition |
| /dev/nvme0n1p2 | ext4 | Separate /boot partition |
| /dev/nvme0n1p3 | ext4 | Linux root filesystem |
These are possible roles, not confirmed assignments.
Do not identify a root partition using its size or position alone.
Verify Partition UUIDs
Run:
blkid
This command displays filesystem identifiers and types.
Linux installations commonly refer to filesystems by UUID because device names can change between boots.
For example, the installed /etc/fstab file may reference a root or data filesystem by UUID rather than /dev/sda2.
Compare the detected UUIDs with the installed system configuration once you have mounted it safely.
Check Existing Mounts
Use:
findmnt
This shows currently mounted filesystems.
It helps identify which devices the rescue system may already have mounted.
Do not assume that all disks remain untouched after rescue boot. Some recovery environments automatically activate or mount storage.
Check RAID, LVM, and Encrypted Storage
Some servers use multiple storage layers.
Common configurations include:
Software RAID: Multiple disks form one or more logical storage arrays.
LVM: Logical Volume Manager groups physical storage into logical volumes.
LUKS encryption: An encryption layer protects disk contents and requires an authorized key or passphrase.
For example, inspect detected RAID arrays using:
cat /proc/mdstat
Inspect available LVM information using:
pvs
vgs
lvs
These commands help you understand the existing storage layout.
Do not recreate RAID arrays, initialize physical volumes, or format partitions while attempting recovery.
If a logical volume or encrypted partition is inactive, consult the relevant RAID, LVM, or encryption recovery procedure before activating it.
For systems using ZFS or Btrfs, use filesystem-specific recovery tools rather than applying ext4 or XFS repair commands.
Step 3: Mount the Installed Filesystem and Recover Important Data
After identifying the correct filesystem, mount it for inspection.
The correct method depends on the filesystem type.
Mount an ext4 Filesystem for Inspection
Create a temporary mount point:
mkdir -p /mnt/recovery
For an ext4 filesystem where avoiding journal replay is important, an example inspection command is:
mount -t ext4 -o ro,noload /dev/nvme0n1p3 /mnt/recovery
Replace /dev/nvme0n1p3 with the verified filesystem device.
Die RO option requests a read-only mount.
Die noload option prevents ext4 journal replay during mounting.
This distinction matters because an ordinary read-only ext4 mount may still replay its journal and write to the device.
Skipping journal replay can expose an inconsistent filesystem view after an unclean shutdown. Therefore, this method is useful for cautious inspection, but it does not guarantee that every file will appear in a fully recovered state.
For XFS, Btrfs, ZFS, and other filesystems, use their specific inspection and recovery procedures.
Check the Installed Operating System
After mounting the correct Linux root filesystem, inspect its OS information:
cat /mnt/recovery/etc/os-release
This helps identify the installed Linux distribution and version.
You can also inspect familiar directories:
ls /mnt/recovery
A typical Linux installation contains directories such as:
etc
home
root
usr
var
boot
If these directories are missing, verify that you mounted the correct filesystem.
Recover Important Files
Once the installed filesystem is accessible, identify the files required to restore your applications.
Common locations include:
| Directory | Typical contents |
| /etc | Operating system and service configuration |
| /home | User accounts and home directories |
| /var/www | Website files on many web servers |
| /var/lib/mysql | MySQL or MariaDB data on common installations |
| /var/lib/postgresql | PostgreSQL data on common installations |
| /var/log | System and application logs |
| /root | Root user’s files and administrative scripts |
Actual application paths may differ.
For example, a web application may store uploaded files in a custom directory or attached data volume.
Copy Files to Healthy Storage
If a separate backup destination is mounted at /mnt/backup, you can use rsync to copy selected files:
rsync -aHAX –numeric-ids \
/mnt/recovery/var/www/ \
/mnt/backup/www/
This example copies website files while preserving important Linux metadata where supported.
Confirm that /mnt/backup points to separate, healthy storage with sufficient free space before running the command.
Do not use a destination on the same failing disk as your only recovery copy.
Database directories require extra care. An offline file copy may preserve database files, but successful recovery depends on the database engine, version, transaction state, and storage consistency.
Whenever possible, recover a verified database backup or follow database-specific recovery instructions.
Review Previous System Logs
Installed-system logs may explain why Linux stopped booting.
If persistent systemd journal files exist, you may be able to inspect them using:
journalctl –directory=/mnt/recovery/var/log/journal –list-boots
To inspect a particular recorded boot, use the boot identifier reported by the command.
You can also inspect conventional logs when present:
ls /mnt/recovery/var/log
Look for evidence of kernel errors, failed mounts, disk failures, and interrupted package updates.
Remember that the rescue environment has its own logs. Running journalctl without specifying the installed system’s journal location may show recovery-session information rather than the failed operating system’s logs.
Step 4: Repair the Problem That Prevents Linux from Booting
After protecting the data and identifying the failure, choose the repair method that matches the problem.
Do not perform every repair below. Each procedure applies to a different failure.
Fix an Incorrect /etc/fstab Konfiguration
Die /etc/fstab file defines how Linux mounts filesystems during startup.
A missing disk, incorrect UUID, or invalid mount configuration can prevent normal boot.
Inspect the installed file:
cat /mnt/recovery/etc/fstab
Compare its entries with the UUIDs returned by:
blkid
For example, suppose /etc/fstab references a storage partition that no longer exists.
Linux may wait for that device or enter emergency mode.
After verifying the cause, back up the original configuration and make the required correction.
If the filesystem is currently mounted read-only, safely unmount it and remount it for authorized changes only after a recoverable backup exists and the storage is healthy.
Avoid adding nofail to every entry.
Die nofail option can be appropriate for some optional filesystems, but it may hide a missing disk that an application needs for normal operation.
Recover from a Full Root or Boot Filesystem
A full filesystem can cause failed updates and service startup problems.
After safely mounting the installed root filesystem, check disk usage:
df -h /mnt/recovery
Check inode usage:
df -i /mnt/recovery
A filesystem can run out of inodes even when it still has available storage capacity.
To inspect large directories on the mounted root filesystem, use:
du -xhd1 /mnt/recovery/var
This can help identify where space is being used.
Common causes include oversized log files, temporary application data, retained backups, and package caches.
Review the affected files before deleting anything.
Do not manually remove active database files, unknown system files, or kernel images simply to free space.
For a full /boot partition, use the installed distribution’s package management process to remove obsolete kernels while retaining a known-working version.
Check and Repair an ext4 Filesystem
If an ext4 filesystem has structural errors, the e2fsck utility can inspect and repair supported problems.
First, confirm the filesystem type and exact target device.
The filesystem must be unmounted before running an offline filesystem check.
Zum Beispiel:
e2fsck -fn /dev/nvme0n1p3
Die -n option prevents automatic approval of changes, while -f forces a check.
This is an inspection example for an ext4 filesystem.
After reviewing the results, you may decide that an actual repair is appropriate.
An interactive repair command is:
e2fsck -f /dev/nvme0n1p3
This operation can modify filesystem metadata.
Only run it after verifying the device, confirming that it is unmounted, and preserving recoverable data.
If the disk is failing or producing repeated I/O errors, image the device or involve a storage recovery specialist before attempting in-place repairs.
Check and Repair an XFS Filesystem
XFS uses a different repair utility.
For an unmounted XFS filesystem, you can perform a dry-run inspection using:
xfs_repair -n /dev/DEVICE
Replace /dev/DEVICE with the confirmed XFS filesystem device.
The inspection may identify metadata inconsistencies.
When a filesystem contains an unclean journal, XFS may require journal recovery through a controlled mount and unmount before repair.
If the filesystem is healthy enough and the required recovery conditions are satisfied, an administrator may run:
xfs_repair /dev/DEVICE
This command makes changes and must be used only on the correct unmounted XFS filesystem.
Do not use xfs_repair -L as a routine troubleshooting command.
That option removes the filesystem log and can discard pending metadata updates, causing data loss. It is a last-resort operation for specific unrecoverable log conditions.
Repair a Broken GRUB Bootloader
GRUB is responsible for starting Linux on many dedicated servers and virtual machines.
If the bootloader fails, the server may display a GRUB prompt or fail to locate the installed operating system.
Before attempting a repair, determine:
- Whether the installed system uses BIOS or UEFI boot.
- Which partition contains the Linux root filesystem.
- Whether /boot is on a separate partition.
- Where the EFI System Partition is mounted.
- Which Linux distribution and GRUB packages are installed.
- Whether Secure Boot is enabled.
These details affect the correct recovery procedure.
A BIOS-based GRUB installation differs from a UEFI installation.
For example, a UEFI system may require correctly mounted EFI files and valid firmware boot entries. A BIOS installation may depend on bootloader files installed to the appropriate disk.
Do not assume that the rescue environment’s current boot mode matches the installed operating system’s intended boot method.
Once you have confirmed the configuration, follow the distribution-specific GRUB repair procedure.
Avoid running grub-install against a guessed disk or partition. Installing to the wrong destination can disrupt other operating systems or boot configurations.
Recover from a Failed Kernel Update
A failed kernel update may leave Linux unable to start.
Typical errors include:
- Kernel panic messages.
- Missing kernel images.
- Failed root filesystem detection.
- Missing storage drivers in the initramfs.
- Incorrect bootloader entries.
First, check whether the bootloader still offers a previous working kernel.
If a previous kernel is available, attempt to boot it using the remote console.
A successful boot with an older kernel can confirm that the recent update needs investigation.
If the installed system cannot boot, the rescue environment may allow you to inspect its kernel and initramfs files.
Zum Beispiel:
ls /mnt/recovery/boot
On Debian and Ubuntu systems, update-initramfs is commonly used to rebuild installed kernel initramfs images.
On RHEL-family systems, dracut serves a similar purpose.
However, the correct command depends on the distribution and installed kernel version.
Do not use the rescue environment’s uname -r output to select the installed operating system’s kernel. That command identifies the currently running rescue kernel.
Restore SSH or Network Access
If the operating system starts normally but SSH remains unavailable, the server may not need boot repair.
Use the remote console to inspect network configuration, SSH service status, firewall rules, and authentication settings.
For a running system that uses systemd, common diagnostic commands include:
systemctl status ssh
Or, on distributions that name the service sshd:
systemctl status sshd
Check the SSH configuration syntax with the appropriate installed SSH daemon, for example:
sshd -t
Review network address assignments, routing, and firewall rules before changing them.
Avoid disabling the entire firewall or enabling root password authentication just to regain access.
When Do You Need chroot During Server Recovery?
Die chroot command changes the root directory seen by a process.
It allows an administrator to run certain tools using the installed Linux system’s directories while working from another environment.
For example, a chroot environment can help with package repair, kernel maintenance, and some bootloader recovery tasks.
However, chroot does not boot the installed operating system.
It also does not automatically provide all the services, devices, or kernel features available during normal operation.
Preparing a chroot Environment
Before using chroot:
- Mount the verified installed root filesystem at a suitable location.
- Mount separate /boot and EFI partitions at their correct locations when required.
- Ensure the installed operating system is compatible with the rescue environment’s architecture.
- Make the required device and virtual filesystems available.
- Configure DNS access if the repair requires network downloads.
- Confirm the appropriate mount propagation and cleanup procedure.
For example, when the installed system is correctly prepared under /mnt/recovery, entering the environment may involve:
chroot /mnt/recovery /bin/bash
This command assumes the root filesystem and required mounts are already correctly prepared and that the installed shell is usable.
Do not run it against an arbitrary directory.
After completing the approved repair, exit the chroot environment and unmount its supporting filesystems in the correct order.
When Is chroot Useful?
Chroot is commonly useful when you need to:
- Reinstall or repair installed operating system packages.
- Rebuild a damaged initramfs.
- Repair supported bootloader configurations.
- Inspect installed package versions.
- Correct certain operating system configuration problems.
It is less useful when the primary problem is failing hardware, unreadable storage, or an inaccessible encrypted volume.
Step 5: Exit Rescue Mode and Reboot the Server
After completing the necessary repair, prepare the server to boot from its normal operating system.
First, verify that important changes have been saved.
If you entered a chroot environment, exit it:
exit
Finish pending writes and unmount recovery filesystems using the correct procedure for your storage layout.
Before rebooting, check whether the provider requires you to disable network rescue boot, detach a recovery ISO, or change the next boot device.
The normal reboot command is:
reboot
However, rebooting alone may not return every hosting platform to normal boot mode.
Use the provider’s supported exit procedure.
Verify That the Operating System Boots Successfully
Watch the remote console as the server starts.
Check that:
- The firmware detects the intended boot device.
- The bootloader loads correctly.
- The expected Linux kernel starts.
- Required filesystems mount successfully.
- The server reaches a normal login prompt.
If these checks succeed, the operating system may be recovered.
But a successful login does not mean every hosted service is functioning correctly.
Check Server Services After Recovery
After normal startup, confirm that the operating system and applications are healthy.
Useful commands include:
systemctl –failed
This lists failed systemd units.
Check mounted storage:
findmnt
Review filesystem usage:
df -h
Inspect recent boot errors:
journalctl -b -p err
Review active network connections and listening services when needed:
ss -tuln
Also verify websites, application endpoints, database health, scheduled jobs, and backup operations.
For a production server, test the actual service that users depend on rather than relying only on operating system status.
When Should You Restore a Backup Instead of Repairing the OS?
Not every unbootable operating system should be repaired in place.
In some situations, restoring a verified backup or rebuilding the server provides a more reliable recovery path.
| Recovery method | Best suited for | Main consideration |
| Configuration repair | Incorrect mount, network, or boot settings | Requires a confirmed cause |
| Filesystem repair | Supported filesystem inconsistencies | May change or discard damaged metadata |
| Backup restoration | Recoverable system or application backups | Depends on backup age and restore testing |
| Clean OS installation | Severely damaged or untrusted operating system | Requires application and data restoration |
| Storage recovery | Failing disks or damaged storage arrays | May require imaging or specialist assistance |
Restore a Backup When Recovery Risk Is Too High
A verified backup is especially valuable when:
- The server has multiple damaged system components.
- The installed OS has severe corruption.
- Repair attempts could exceed the acceptable downtime.
- A recent and tested backup is available.
- A clean recovery environment is easier to validate.
Check the backup’s recovery point and restore requirements before overwriting the existing system.
Reinstall the OS When the System Cannot Be Trusted
A clean installation may be appropriate when the operating system has extensive damage or suspected security compromise.
If malicious activity is suspected, preserve the necessary evidence and use a trusted recovery process.
Do not assume that repairing the bootloader or removing a suspicious file makes a compromised operating system safe again.
A clean rebuild from trusted installation media, followed by restoration of verified data and careful credential rotation, is often the better approach.
Can You Use Rescue Mode on a VPS or Cloud Server?
Yes, many VPS and cloud environments support recovery methods similar to dedicated server rescue mode.
The available options depend on the virtualization platform and hosting provider.
A VPS may support a recovery ISO, web console, snapshot, or rescue boot feature.
Cloud platforms may also let you detach the operating system disk and attach it to another virtual machine for inspection.
Unlike a physical dedicated server, a VPS does not usually provide direct access to the underlying storage hardware.
Hardware problems affecting the virtualization host generally require action from the infrastructure provider.
For encrypted disks, RAID configurations, or specialized storage, verify the platform’s supported recovery process before making changes.
How to Recover a Windows Server That Will Not Boot
Windows Server uses different recovery tools from Linux.
If Windows Server fails to start, administrators may use Windows Recovery Environment, Windows Preinstallation Environment, installation media, or provider-supported recovery tools.
Common recovery tasks include:
- Checking startup and boot configuration.
- Inspecting Windows system partitions.
- Reviewing storage controller and driver problems.
- Recovering files from an inaccessible installation.
- Restoring a system backup.
- Troubleshooting failed updates.
Some environments require BitLocker recovery keys before protected volumes can be accessed.
Do not run Linux filesystem repair commands against Windows NTFS partitions.
The correct procedure depends on the Windows Server version, disk configuration, boot mode, and error message.
How to Prevent Future Server Boot Failures
A good recovery plan reduces both the likelihood of data loss and the time required to restore service.
Maintain Tested Backups
Schedule regular backups for operating system configuration, applications, databases, and important user data.
Store backups separately from the primary server.
Most importantly, test restoration.
A backup that has never been restored may contain errors or missing application data.
Monitor Disk Health
Use appropriate monitoring tools to track disk errors, filesystem capacity, and storage health.
On supported physical hardware, SMART monitoring can help identify certain developing disk problems.
Storage monitoring does not predict every failure, so maintain independent backups even when hardware reports healthy status.
Keep Recovery Access Available
Check that authorized administrators can reach the hosting control panel, remote console, and recovery environment when necessary.
Document access procedures securely.
For encrypted systems, maintain protected recovery keys outside the affected server.
Plan Operating System Updates
Before significant kernel, bootloader, or storage changes, confirm that a recent recoverable backup exists.
Where supported, retain a previous known-working kernel.
Record major configuration changes so administrators can identify what happened immediately before a failure.
Document the Storage Layout
Keep a current record of the server’s partitions, filesystem types, UUIDs, logical volumes, RAID configuration, and boot method.
This makes recovery easier when the installed operating system is unavailable.
Recover Your Infrastructure with Atal Networks
Server recovery becomes easier when administrators have reliable access to infrastructure information, backups, and appropriate management tools.
At Atal Networks, we provide dedicated servers, bare metal infrastructure, and VPS hosting for websites, business applications, databases, and other production workloads.
Our infrastructure options include enterprise server hardware, NVMe storage configurations, and network protection features, depending on the selected service.
Whether you are rebuilding an existing deployment or planning a more resilient hosting environment, we can help you evaluate infrastructure requirements for your workload.
Explore our Dedicated Server-Hosting und VPS-Hosting solutions, or contact our team to discuss your deployment requirements.
Frequently Asked Questions About Server Rescue Mode
Does server rescue mode delete data?
Starting a rescue environment does not normally erase the installed operating system or its files. However, filesystem repairs, formatting, reinstallations, and incorrect disk operations can change or delete data. Protect important files before performing recovery operations.
Can I recover files if Linux will not boot?
Yes. If the storage remains readable and the required encryption keys are available, an independent rescue environment may let you mount the installed filesystem and copy important files. Recovery success depends on the disk condition, filesystem state, and storage configuration.
Can I use rescue mode if SSH does not work?
Yes, if your provider offers a suitable independent rescue environment. However, first check whether the installed OS is running through the remote console. A failed SSH connection may be caused by network or authentication settings rather than an operating system failure.
Why are my disks missing in rescue mode?
Disks may be missing because of storage controller drivers, inactive RAID arrays, LVM configuration, disconnected volumes, or hardware failure. Check device detection and the storage layout before attempting to create or repair partitions.
Can rescue mode access an encrypted disk?
Yes, provided the rescue environment supports the encryption format and you have the correct recovery key or passphrase. Rescue mode does not bypass disk encryption.
Should I run fsck on a mounted filesystem?
No. Filesystem repair tools generally require the target filesystem to be unmounted. Running repair operations against a mounted filesystem can cause additional damage. Verify the filesystem type and follow its supported offline repair procedure.
Why does my server keep booting into rescue mode?
The server may still have a rescue boot option enabled, recovery media attached, or an incorrect boot-device selection. Check your provider’s recovery settings and the server’s firmware boot configuration before restarting.
How long does server recovery take?
Recovery time depends on the cause of the failure, disk health, filesystem size, available backups, and required repairs. A small configuration issue may be resolved relatively quickly, while hardware failure or extensive corruption can require a much longer recovery process.
Is rescue mode the same as reinstalling the operating system?
No. Rescue mode starts a separate environment for troubleshooting and recovery. Reinstalling the OS replaces or rebuilds the installed operating system and may overwrite existing data.
Can rescue mode fix a kernel panic?
Sometimes. Rescue mode can help inspect installed kernels, repair initramfs files, correct storage configuration, or recover from a failed update. The correct fix depends on the kernel panic message and its underlying cause.
Letzte Gedanken
A server that cannot boot is not always a server that cannot be recovered.
Server rescue mode provides a practical way to investigate an unbootable operating system, access recoverable data, and repair supported software problems without immediately reinstalling Linux.
The most important step is identifying the real failure before making changes.
Protect your files, confirm the disk layout, inspect the error, and choose the repair that matches the problem.
If the storage is failing or the operating system cannot be trusted, restoring a verified backup or rebuilding on healthy infrastructure may be safer than attempting repeated repairs.
With tested backups, documented configurations, and reliable recovery access, you can reduce the impact of future server failures and bring critical services back online with greater confidence.