 Μετάβαση στο περιεχόμενο









IPMI (Intelligent Platform Management Interface) is a standardized protocol for out-of-band server management, giving you hardware-level access to a server independent of its operating system. The BMC (Baseboard Management Controller) is the dedicated processor on the server motherboard that implements IPMI. It runs on standby power and stays operational even when the OS crashes, SSH becomes unreachable, or the server powers off. Through IPMI, you can power a server on or off, read temperature and fan sensors, view the hardware event log, launch a KVM remote console, and access the server via Serial over LAN, all without touching the machine physically. IPMI 2.0, the current standard published by the DMTF on February 12, 2004, added Serial over LAN, enhanced RMCP+ authentication, VLAN support, and cipher suites. This guide covers everything from initial setup to security hardening, incident recovery, and Ansible automation.
Every data center operator knows the situation: a production server stops responding. SSH times out. Ping fails. You have a choice between opening an urgent support ticket and waiting for a technician, or connecting directly to the server’s BMC through IPMI and resolving the issue yourself in minutes.
IPMI is the difference between those two outcomes.
This guide covers the complete IPMI workflow, BMC architecture, setup commands, power control, sensor monitoring, KVM console, SOL access, network isolation, security hardening, Redfish integration, and Ansible automation. Every section is practical, every command is tested, and every security recommendation reflects real CVEs, not generic advice.
 1
1
IPMI and BMC: How Out-of-Band Management Actually Works
The BMC is a separate SoC (System-on-Chip) embedded on the server motherboard. It has its own processor, its own NIC (either dedicated or shared with the host), its own memory, and its own firmware running independently of the host OS. The BMC draws power from the 3.3V standby rail, which means it stays operational when the main server is powered off as long as the power supply is plugged in.
This physical separation is the entire point of out-of-band management. Your SSH connection requires a working OS, a working network stack, and a working NIC driver. The moment any of those fails, SSH dies. IPMI never touches any of them.
In-Band vs Out-of-Band: The Critical Difference
| Παράγοντας | In-Band Management | Out-of-Band (IPMI) |
| Requires OS to be running | ναι | Όχι |
| Survives kernel panic | Όχι | ναι |
| Survives network driver crash | Όχι | ναι |
| Works with server powered off | Όχι | Yes (standby power) |
| Tools | SSH, RDP, SNMP | ipmitool, iDRAC, iLO, iKVM |
| Physical path | Production NIC | Dedicated or shared management NIC |
Concrete scenario: a server running a busy database enters a kernel panic at 3 am. The OOM killer ran, a driver deadlocked, and the kernel threw a null pointer dereference. SSH dies instantly. Your monitoring system fires an alert. You open an ipmitool connection to the BMC, read the System Event Log to see what triggered the panic, launch the KVM console to view the kernel crash output on screen, and power-cycle the server, all within five minutes without a support ticket.
IPMI Architecture: BMC, IPMB, SDR, and SEL
Five components form the IPMI management stack. Each has a specific role:
- BMC (Baseboard Management Controller): the main IPMI processor embedded on the motherboard; handles all management functions
- IPMB (Intelligent Platform Management Bus): I²C-based bus connecting the BMC to satellite management controllers on expansion cards and chassis components
- ICMB (Intelligent Chassis Management Bus): connects management controllers across multiple chassis in a blade or rack system
- SDR (Sensor Data Record): a database stored on the BMC containing sensor definitions, threshold values, and alert conditions for every hardware sensor
- SEL (System Event Log): a hardware event log stored on the BMC that records every monitored hardware event with timestamps; survives OS crashes and power cycles
Understanding the SDR and SEL is the difference between reactive and proactive server management. The SDR stores the thresholds that trigger alerts. The SEL records every time a threshold was crossed. Many hardware failures leave SEL entries hours or days before the system fails, correctable memory errors accumulating before an uncorrectable error crashes the system, fan RPM dropping below threshold before a CPU overheats.

IPMI Versions: 1.0, 1.5, and 2.0
IPMI has evolved through three major versions. Knowing which version your hardware supports determines which features are available.
| Version | Release Date | Key Features |
| IPMI 1.0 | September 16, 1998 | Basic sensor monitoring, power control, event logging |
| IPMI 1.5 | February 21, 2001 | IPMI over LAN, IPMI over serial/modem, LAN alerting |
| IPMI 2.0 | February 12, 2004 | Serial over LAN (SOL), RMCP+ authentication (RAKP), VLAN support, cipher suites, firmware firewall |
| IPMI 2.0 Rev 1.1 | October 1, 2013 | IPv6 addressing support added |
Virtually every server sold after 2004 supports IPMI 2.0. If you are running hardware from the last 20 years, you have IPMI 2.0. Three IPMI 2.0 features matter most in daily operations:
**Serial over LAN (SOL): Text console access through the IPMI channel, showing BIOS output, kernel boot messages, and OS console before SSH becomes available. SOL requires serial console configuration in BIOS and OS bootloader (covered in the KVM and SOL section below).
**RMCP+ with RAKP: The IPMI 2.0 authentication protocol using HMAC-based key exchange. Stronger than IPMI 1.5’s MD5 authentication. Critical note: RMCP+ still has known vulnerabilities through RAKP hash attacks (CVE-2013-4786) if cipher 0 is enabled: covered in the security section.
**Cipher Suites: AES-128 channel encryption for IPMI 2.0 communications. Cipher 17 (HMAC-SHA256 + AES-CBC-128) is the secure option. Cipher 0 allows authentication bypass. Cipher 3 uses MD5 which is cryptographically broken. These specifics matter: the security section covers exact commands to disable the insecure ciphers.
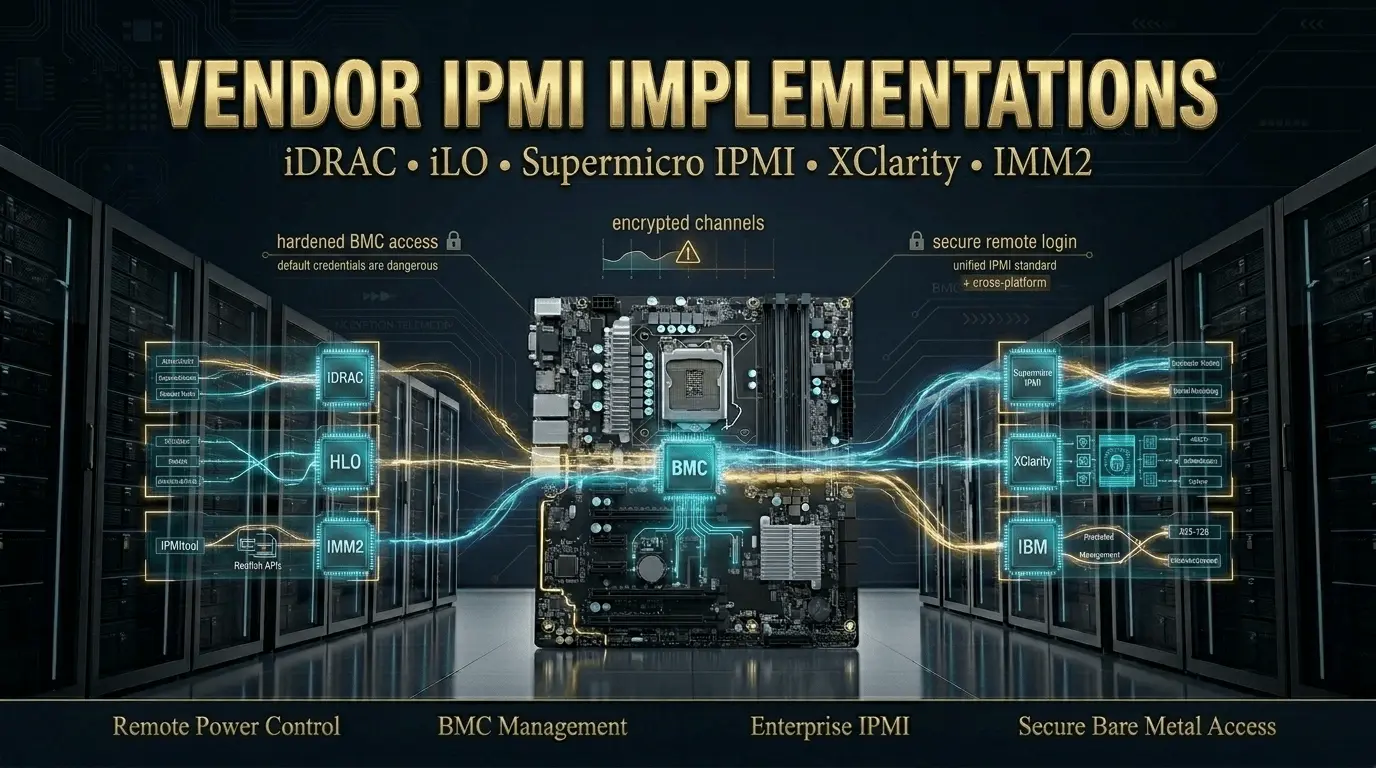
Vendor Implementations: iDRAC, iLO, Supermicro IPMI, XClarity, and IMM
IPMI 2.0 is the standard, but vendors build proprietary implementations on top of it. Standard ipmitool commands work across all of them for core operations. Vendor-specific features require vendor tools.
| Vendor | IPMI Implementation | Web Interface URL | Default Username | Default Password |
| Μικρή και στενή κοιλάδα | iDRAC (Integrated Dell Remote Access Controller) | https://IDRAC_IP | root | calvin |
| HP / HPE | iLO (Integrated Lights-Out) | https://ILO_IP | admin | (printed on server label) |
| Supermicro | Supermicro IPMI | https://IPMI_IP | ADMIN | ADMIN |
| Lenovo | XClarity Controller (XCC) | https://XCC_IP | USERID | PASSW0RD |
| IBM | IMM2 (Integrated Management Module 2) | https://IMM_IP | USERID | PASSW0RD |
These are factory defaults. Change every one of them immediately after first login. Every default password above is publicly documented, indexed by Shodan, and actively exploited by automated scanners. Thousands of internet-accessible BMC interfaces still run on factory credentials.
Vendor extensions beyond IPMI standard: iDRAC adds WSMAN, Redfish, and Lifecycle Controller for OS deployment. iLO adds the iLO RESTful API. XClarity adds XClarity Administrator integration for fleet management. Standard ipmitool commands cover power control, sensors, SEL, and SOL across all vendors. For vendor-specific features, Dell uses racadm, HP uses hpilo and the iLO API, and Supermicro uses IPMIView και SMCIPMITool.

Setting Up IPMI Access: Step-by-Step
Before running any management commands, the BMC needs a network address and your machine needs ipmitool installed.
Install ipmitool:
# Debian / Ubuntu
sudo apt update && sudo apt install -y ipmitool
# RHEL / CentOS / Rocky / AlmaLinux
sudo yum install -y ipmitool
# or on newer systems:
sudo dnf install -y ipmitool
# Load required kernel modules for in-band access
sudo modprobe ipmi_msghandler
sudo modprobe ipmi_devintf
sudo modprobe ipmi_si
# Make modules persistent across reboots
echo “ipmi_msghandler” | sudo tee -a /etc/modules
echo “ipmi_devintf” | sudo tee -a /etc/modules
echo “ipmi_si” | sudo tee -a /etc/modules
# Verify the device node exists
ls /dev/ipmi0
Step 1: Check BMC Network Configuration
# View current BMC network settings (in-band, from the running OS)
sudo ipmitool lan print 1
# Expected output:
# IP Address Source : Static Address
# IP Address : 192.168.100.50
# Subnet Mask : 255.255.255.0
# Default Gateway : 192.168.100.1
# MAC Address : XX:XX:XX:XX:XX:XX
# VLAN ID : Disabled
# If channel 1 returns nothing, try channel 2 or 3
sudo ipmitool lan print 2
Step 2: Set a Static IP for the BMC
Static IP configuration is mandatory for production environments. DHCP addresses change and you lose access.
# Set static IP assignment mode
sudo ipmitool lan set 1 ipsrc static
# Set the BMC IP address
sudo ipmitool lan set 1 ipaddr 192.168.100.50
# Set subnet mask
sudo ipmitool lan set 1 netmask 255.255.255.0
# Set default gateway
sudo ipmitool lan set 1 defgw ipaddr 192.168.100.1
# Enable IPMI over LAN
sudo ipmitool lan set 1 access on
# Verify the changes
sudo ipmitool lan print 1
Critical: Never put the BMC IP on the same subnet as your public-facing production NIC. The management interface must sit on a separate, isolated network, covered fully in the network architecture section.
Step 3: Access via Web Browser
Open a browser and navigate to https://[BMC_IP]. Accept the self-signed certificate. Log in with vendor credentials from the table above and change the password immediately.
The dashboard shows: current power state, CPU and memory health, recent SEL entries, and active alerts. The Remote Console or Virtual Console menu item launches the KVM over IP session. Note that modern BMC firmware (post-2015 iDRAC 7+, iLO 4+, Supermicro X10+) uses an HTML5 console that works in any modern browser without plugins. Older firmware requires a Java KVM applet, a clear sign that firmware needs updating.
Step 4: Connect via ipmitool Remotely (Out-of-Band)
# Remote out-of-band connection syntax
# -H = BMC IP address
# -U = username
# -P = password
# -I lanplus = IPMI 2.0 with RMCP+ (required for encrypted sessions)
# -C 17 = cipher suite 17 (SHA256 + AES256, most secure)
ipmitool -H 192.168.100.50 -U admin -P yourpassword -I lanplus -C 17 chassis status
# Check power state
ipmitool -H 192.168.100.50 -U admin -P yourpassword -I lanplus -C 17 power status
# Get BMC firmware version and hardware info
ipmitool -H 192.168.100.50 -U admin -P yourpassword -I lanplus -C 17 bmc info
Always use -I lanplus for remote connections, not -I lan. The lan interface uses IPMI 1.5 with MD5 authentication. The lanplus interface uses IPMI 2.0 RMCP+ with AES-128 encryption. Adding -C 17 explicitly requests the strongest cipher suite and avoids falling back to weaker ciphers.

Core IPMI Operations: Power Control, Sensors, and Event Logs
This section is the practical reference. Every command runs over an out-of-band connection using the pattern above.
Power Control
# Check current power state
ipmitool -H $BMC -U $USER -P $PASS -I lanplus -C 17 power status
# Power on (works even when server is completely off on standby power)
ipmitool -H $BMC -U $USER -P $PASS -I lanplus -C 17 power on
# Graceful shutdown, sends ACPI signal, OS shuts down cleanly
ipmitool -H $BMC -U $USER -P $PASS -I lanplus -C 17 power soft
# Hard power off, immediate, no OS shutdown; use only when OS is unresponsive
ipmitool -H $BMC -U $USER -P $PASS -I lanplus -C 17 power off
# Hard power cycle, off then on with pause; correct for hung servers
ipmitool -H $BMC -U $USER -P $PASS -I lanplus -C 17 power cycle
# Hardware reset, sends RESET signal, like pressing the physical reset button
ipmitool -H $BMC -U $USER -P $PASS -I lanplus -C 17 power reset
# Detailed chassis status (power state, intrusion, buttons)
ipmitool -H $BMC -U $USER -P $PASS -I lanplus -C 17 chassis status
Use power soft whenever the OS is still running, it shuts down gracefully and protects filesystem integrity. Use power cycle for unresponsive servers rather than separate power off + power on commands, the cycle command includes a mandatory pause between off and on states that prevents power supply stress.
Hardware Sensor Monitoring
# List all sensors (temperature, voltage, fan speed, current)
ipmitool -H $BMC -U $USER -P $PASS -I lanplus -C 17 sdr list full
# Filter by sensor type
ipmitool -H $BMC -U $USER -P $PASS -I lanplus -C 17 sdr type Temperature
ipmitool -H $BMC -U $USER -P $PASS -I lanplus -C 17 sdr type Fan
ipmitool -H $BMC -U $USER -P $PASS -I lanplus -C 17 sdr type Voltage
# Get sensor readings with threshold values
# Thresholds show: Lower Non-Recoverable, Lower Critical, Lower Non-Critical
# and: Upper Non-Critical, Upper Critical, Upper Non-Recoverable
ipmitool -H $BMC -U $USER -P $PASS -I lanplus -C 17 sensor list
# Watch live sensor readings (refreshes every 2 seconds)
watch -n 2 “ipmitool -H $BMC -U $USER -P $PASS -I lanplus -C 17 sdr list full \
| grep -iE ‘Temp|Fan|Volt'”
The SDR database contains threshold values for every sensor. When a reading exceeds the Upper Critical threshold, the BMC typically triggers an automatic protective shutdown. Catching a temperature or fan reading at the Upper Non-Critical level, before it hits Upper Critical, gives you time to respond before the hardware takes the protective action for you.
System Event Log (SEL): The Most Underused IPMI Feature
# View the SEL with full descriptions
ipmitool -H $BMC -U $USER -P $PASS -I lanplus -C 17 sel elist
# SEL info (total entries, free space)
ipmitool -H $BMC -U $USER -P $PASS -I lanplus -C 17 sel info
# Save SEL to a log file before clearing
ipmitool -H $BMC -U $USER -P $PASS -I lanplus -C 17 sel elist \
> /var/log/sel-$(hostname)-$(date +%Y%m%d-%H%M%S).txt
# Clear the SEL after saving and resolving issues
ipmitool -H $BMC -U $USER -P $PASS -I lanplus -C 17 sel clear
The SEL stores hardware events with precise timestamps, power supply failures, over-temperature events, correctable and uncorrectable memory errors, and chassis intrusion events. These entries survive server reboots, OS crashes, and power cycles because they live in the BMC’s non-volatile storage, not on the main server disk.
A server that rebooted unexpectedly with no OS crash dump almost always left SEL entries. Check the SEL first, before application logs, before OS logs. A correctable memory error entry at 2:47am followed by a system restart at 2:47am is a failing DIMM, not a random reboot. That distinction saves hours of unnecessary troubleshooting.

KVM Console and Serial over LAN: Remote Screen Access
IPMI gives you two ways to access a remote console when SSH is unavailable.
KVM over IP: Full Graphical Console
KVM over IP streams the server’s physical display output to your browser, along with keyboard and mouse input. You see exactly what a physical monitor connected to the server would show: BIOS/UEFI setup screens, POST messages, the OS boot sequence, and the desktop or terminal after boot.
Combined with virtual media (ISO mounting), KVM over IP gives you the same capability as standing in front of the server. You can boot from a remote ISO, reinstall the OS, enter BIOS to change boot settings, and respond to a boot failure, all remotely.
Launch the KVM console from the web interface:
- Log into https://[BMC_IP]
- Navigate to the remote console section (Dell: Virtual Console; HP: Remote Console; Supermicro: Remote Control)
- Select HTML5 Console for modern firmware or Java Console for legacy firmware
- HTML5 works in any browser without plugins; Java requires JRE and opens port 5900
If your firmware only offers a Java console, prioritize BMC firmware updates. The Java applet is deprecated, has known security issues, and frequently breaks with OS security updates that restrict unsigned Java execution.
Serial over LAN (SOL): Text Console Access
SOL is a text-only serial console over the IPMI connection. It captures the server’s serial port output and sends it through the IPMI channel, giving you visibility into BIOS text output, the bootloader, kernel early boot messages, and OS console, before the OS reaches the point where SSH works.
SOL requires serial console configuration in both BIOS and the OS bootloader.
Configure GRUB for serial console (Linux):
# Edit GRUB configuration
sudo nano /etc/default/grub
# Add these lines
GRUB_CMDLINE_LINUX=”console=tty0 console=ttyS0,115200n8″
GRUB_TERMINAL=”console serial”
GRUB_SERIAL_COMMAND=”serial –unit=0 –speed=115200″
# Apply the changes
sudo update-grub
# Reboot to activate serial console
sudo reboot
Also enable serial console in BIOS before using SOL: Navigate to BIOS Advanced Settings and enable Serial Console Redirection on COM1 or COM2 at 115200 baud. The exact path varies by vendor, check your motherboard documentation.
SOL connection commands:
# Activate SOL console (connects to serial console through IPMI)
ipmitool -H $BMC -U $USER -P $PASS -I lanplus -C 17 sol activate
# The console will appear after pressing Enter
# To exit: use Ctrl+] or the sequence ~ + .
# Deactivate from a second terminal if the session is stuck
ipmitool -H $BMC -U $USER -P $PASS -I lanplus -C 17 sol deactivate
# Check SOL configuration
sudo ipmitool sol info
SOL is the correct tool for low-bandwidth connections (VPN over a slow link), automated recovery scripts, and situations where you only need text output. KVM is the correct tool when you need a graphical display or need to interact with a BIOS that does not support text mode.

IPMI Network Architecture: Isolation and VLAN Configuration
The most dangerous IPMI deployment mistake is putting the BMC on the same network as production traffic, or worse, exposing it to the internet. Because the BMC has hardware-level server control (power, console, firmware), it requires stricter network isolation than any other service you run.
The Three-Network Architecture
Correct IPMI deployment uses three separate networks:
Production network: Application traffic, SSH from jump hosts, load balancer backends. Standard server NICs.
Management network (out-of-band): BMC interfaces only. Dedicated out-of-band management switch. Isolated VLAN with no routing to the production network or internet. Access only via VPN or a hardened bastion host.
Bastion host (jump server): A single hardened server with two NICs, one on the production network, one on the management network. All IPMI access routes through this bastion host. The bastion host logs all sessions and requires MFA for access.
Internet
|
VPN endpoint
|
Bastion Host (production NIC + management NIC)
|
Management VLAN switch (isolated, no internet routing)
| | | |
BMC1 BMC2 BMC3 BMC4
| | | |
Srv1 Srv2 Srv3 Srv4
This topology means there is no direct path from the internet to any BMC. Even a compromised production server cannot reach the management VLAN without going through the bastion host’s management NIC, which has its own access controls.
VLAN Configuration on the BMC
# Enable VLAN tagging on the BMC (requires IPMI 2.0)
ipmitool -H $BMC -U $USER -P $PASS -I lanplus -C 17 lan set 1 vlan id 100
# Verify VLAN is configured
ipmitool -H $BMC -U $USER -P $PASS -I lanplus -C 17 lan print 1 | grep -i vlan
# Disable VLAN tagging (revert to untagged)
ipmitool -H $BMC -U $USER -P $PASS -I lanplus -C 17 lan set 1 vlan id off
Verify that your BMC firmware supports VLAN before configuring. Older firmware may accept the command but not apply it correctly. Confirm the VLAN assignment is active by pinging the BMC IP from a host on the management VLAN after configuration.
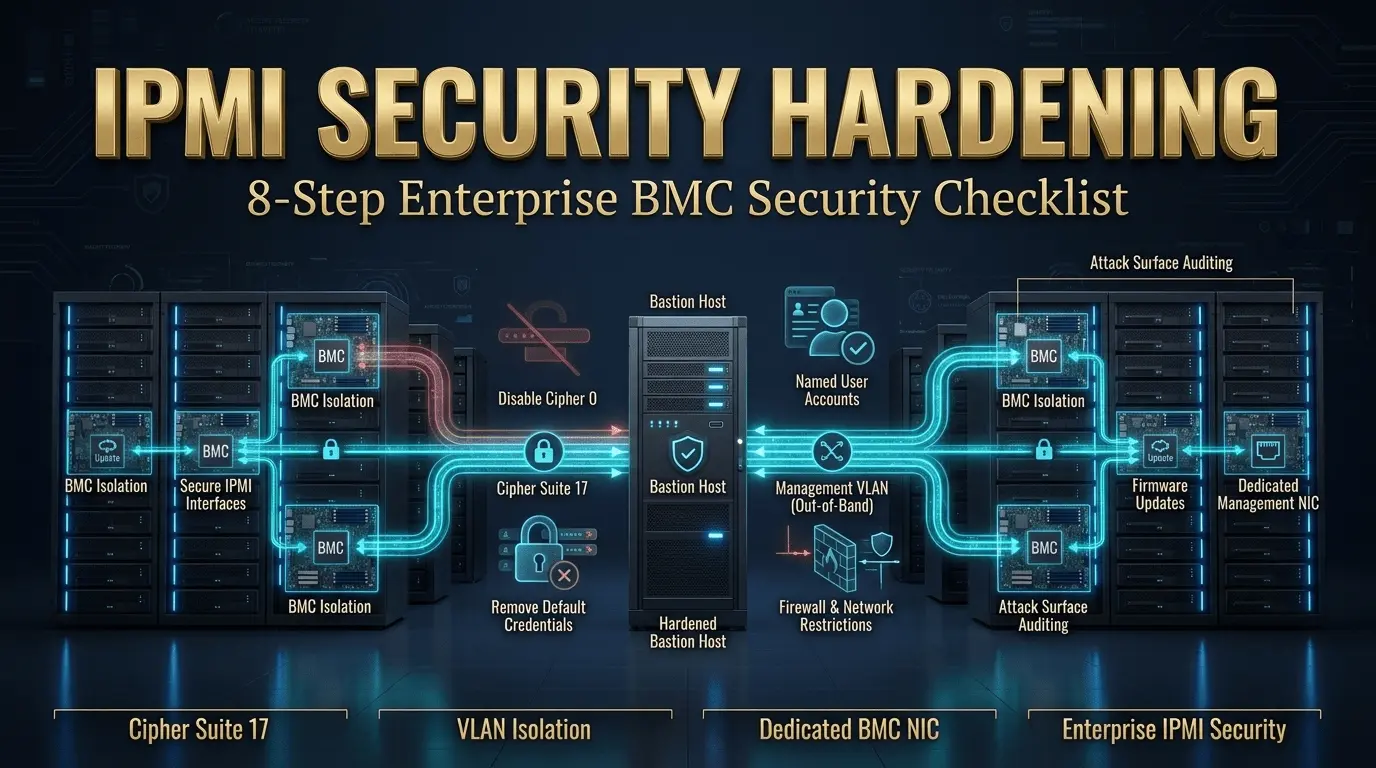
IPMI Security Hardening: The 8-Step Checklist
IPMI has a documented history of exploitable vulnerabilities. The root cause in most real-world breaches is not the protocol itself, it is misconfiguration. Exposed interfaces, default credentials, and cipher 0 still running are responsible for the vast majority of IPMI compromises. The checklist below fixes every common misconfiguration with exact commands.
Step 1: Disable Cipher 0 (Authentication Bypass)
Cipher 0 allows any user to authenticate with any password, including an empty one. It was enabled by default on virtually all IPMI 2.0 implementations until major vendors began patching it. Many production servers still have it enabled.
# Check which ciphers are currently enabled
ipmitool -H $BMC -U $USER -P $PASS -I lanplus channel getciphers ipmi
# Disable cipher 0 on channel 1
ipmitool -H $BMC -U $USER -P $PASS -I lanplus channel setcipher ipmi 1 0 readonly
# Verify cipher 0 is disabled
ipmitool -H $BMC -U $USER -P $PASS -I lanplus channel getciphers ipmi
Step 2: Enforce Cipher Suite 17 for All Connections
Cipher 17 uses HMAC-SHA256 for authentication and AES-CBC-128 for encryption, the strongest standard cipher suite in IPMI 2.0.
# Always specify cipher 17 explicitly when connecting
ipmitool -H $BMC -U $USER -P $PASS -I lanplus -C 17 chassis status
# Never use cipher 3 (MD5, cryptographically broken)
# Never use cipher 0 (auth bypass, disabled in Step 1)
# -C 17 prevents fallback to weaker ciphers
Step 3: Change All Default Credentials
# List current IPMI user accounts
ipmitool -H $BMC -U $USER -P $PASS -I lanplus user list 1
# Change password for user ID 2 (the main admin account on most systems)
ipmitool -H $BMC -U $USER -P $PASS -I lanplus user set password 2 ‘YourStrongPassword!’
# Disable user ID 1 (anonymous/null user present on most systems)
ipmitool -H $BMC -U $USER -P $PASS -I lanplus user disable 1
Step 4: Create Named User Accounts
Named accounts enable session auditing. You can trace which administrator performed which action in the BMC audit log.
# Create a named admin account (slot 3)
ipmitool -H $BMC -U $USER -P $PASS -I lanplus user set name 3 “j.smith”
ipmitool -H $BMC -U $USER -P $PASS -I lanplus user set password 3 ‘UniqueStrongPassword1!’
ipmitool -H $BMC -U $USER -P $PASS -I lanplus user enable 3
# Set privilege level on channel 1
# Privilege levels: 2=User, 3=Operator, 4=Administrator
ipmitool -H $BMC -U $USER -P $PASS -I lanplus channel setaccess 1 3 \
link=on ipmi=on callin=on privilege=4
# Verify access configuration
ipmitool -H $BMC -U $USER -P $PASS -I lanplus channel getaccess 1 3
Step 5: Restrict BMC Access at the Network Layer
Apply firewall rules on the management VLAN gateway to restrict which hosts can reach the BMC management ports.
# Allow only the bastion host (192.168.200.10) to reach IPMI ports
iptables -I INPUT -p udp –dport 623 -s 192.168.200.10 -j ACCEPT
iptables -I INPUT -p udp –dport 623 -j DROP
# Restrict web interface (port 443) to bastion host
iptables -I INPUT -p tcp –dport 443 -s 192.168.200.10 -j ACCEPT
iptables -I INPUT -p tcp –dport 443 -j DROP
# Make rules persistent
iptables-save > /etc/iptables/rules.v4
Step 6: Keep BMC Firmware Updated
BMC firmware vulnerabilities are patched by vendors regularly. Outdated firmware is the second most common IPMI attack vector after default credentials. Set a quarterly firmware review schedule.
- Dell iDRAC firmware: dell.com/support, search for your server model + iDRAC firmware
- HPE iLO firmware: hpe.com/support, search for your server model + iLO firmware
- Supermicro BMC firmware: supermicro.com/en/solutions/management-software/bmc-resources
Step 7: Put IPMI on a Dedicated Management NIC
Shared NIC mode allows BMC traffic to flow through the same physical NIC as production traffic. This creates risk of management traffic leaking onto the production network.
On Dell iDRAC: iDRAC Settings → Connectivity → Network → NIC Selection → Dedicated On HPE iLO: Network → iLO Network Access → Network Settings → NIC Selection → Dedicated
Dedicated NIC mode requires a physical management port to be cabled to the management switch.
Step 8: Audit Your Attack Surface
# Check if IPMI is accidentally reachable from unexpected networks
# Run from outside the management VLAN
nmap -sU -p 623 192.168.100.50
# If you see port 623 open from a production network,
# your VLAN isolation is misconfigured
# Also scan for the web interface
nmap -p 443 192.168.100.50
The three most exploited IPMI vectors in the wild: default credentials, cipher 0 enabled, and BMC exposed to the internet (Shodan indexes thousands of them daily). Steps 1-4 above address all three. Combine them with network isolation from Step 5 and firmware updates from Step 6, and your BMC attack surface drops to near zero.
Redfish vs IPMI: Choosing the Right Tool
Redfish is the DMTF standard that succeeds IPMI for modern server automation. Both are used in production today, and both have appropriate use cases. The choice depends on your scale and workflow, not on which one is “newer.”
| Παράγοντας | IPMI 2.0 | Redfish (DMTF 2015+) |
| Standard body | DMTF | DMTF |
| Protocol | UDP 623 (RMCP+) | HTTPS 443 (REST/JSON) |
| Authentication | RAKP, cipher suites | OAuth 2.0, TLS 1.2+ |
| Data format | Binary protocol | Standardized JSON schema |
| CLI tool | ipmitool | curl, HTTPie, custom scripts |
| IaC integration | Ansible ipmi_power module | Ansible URI, Terraform, Python requests |
| Hardware support | All servers since 2004 | Modern firmware post-2015 generally |
| Best for | Single server access, quick operations, legacy hardware | Fleet automation, pipelines, infrastructure-as-code |
A Redfish power control request looks like this:
# Get system information via Redfish
curl -k -u admin:password https://BMC_IP/redfish/v1/Systems/1
# Get current power state
curl -k -u admin:password https://BMC_IP/redfish/v1/Systems/1 \
| python3 -m json.tool | grep PowerState
# Power on via Redfish REST API
curl -k -u admin:password \
-X POST \
-H “Content-Type: application/json” \
-d ‘{“ResetType”: “On”}’ \
https://BMC_IP/redfish/v1/Systems/1/Actions/ComputerSystem.Reset
# Power off (graceful)
curl -k -u admin:password \
-X POST \
-H “Content-Type: application/json” \
-d ‘{“ResetType”: “GracefulShutdown”}’ \
https://BMC_IP/redfish/v1/Systems/1/Actions/ComputerSystem.Reset
Use IPMI and ipmitool when you need direct access to a single server, the hardware predates 2015, or your team prefers CLI workflows. Use Redfish when you manage server fleets at scale, integrate with Terraform or Ansible URI modules, or need standardized JSON output for monitoring pipelines. Many environments use both, ipmitool for manual operations and Redfish API calls in automation scripts.
Automating IPMI with Ansible
Ansible’s community.general collection includes two IPMI modules for fleet management: ipmi_power και ipmi_boot. A single playbook running against an inventory of BMC addresses can power-cycle, set boot order, and provision an entire rack without physical access.
—
# ipmi-management.yml
# Requires: pip install pyghmi (Python IPMI library)
# Install collection: ansible-galaxy collection install community.general
– name: IPMI Fleet Management
hosts: localhost
gather_facts: false
vars:
ipmi_host: “192.168.100.50”
ipmi_user: “admin”
ipmi_password: “{{ vault_ipmi_password }}” # Always use Ansible Vault
tasks:
– name: Check server power state
community.general.ipmi_power:
name: “{{ ipmi_host }}”
user: “{{ ipmi_user }}”
password: “{{ ipmi_password }}”
state: present
register: power_result
– name: Print power state
debug:
msg: “Power state: {{ power_result }}”
– name: Power on server
community.general.ipmi_power:
name: “{{ ipmi_host }}”
user: “{{ ipmi_user }}”
password: “{{ ipmi_password }}”
state: on
– name: Set boot device to PXE for provisioning
community.general.ipmi_boot:
name: “{{ ipmi_host }}”
user: “{{ ipmi_user }}”
password: “{{ ipmi_password }}”
bootdev: “network”
persistent: false # PXE boot on next boot only
– name: After provisioning, restore disk boot
community.general.ipmi_boot:
name: “{{ ipmi_host }}”
user: “{{ ipmi_user }}”
password: “{{ ipmi_password }}”
bootdev: “disk”
persistent: true # Permanent disk boot
For a rack of 40 servers, replace the ipmi_host var with a loop over a YAML inventory list of BMC IPs. Ansible handles the parallel connections and provides per-host results. This pattern is how large operators provision bare metal racks from a single command without opening a KVM session on each server.
Store IPMI credentials in Ansible Vault, never in plain-text variable files or source control.
Real-World Incident Recovery: The 2am Playbook
Production server at 192.168.1.100 has stopped responding. SSH times out. Your monitoring system fired an alert 3 minutes ago. Here is the exact recovery workflow.
Step 1: Confirm the Problem (30 seconds)
# Confirm SSH is down
ssh -o ConnectTimeout=5 [email protected]
# Expected: Connection timed out
# Confirm ping is failing
ping -c 3 192.168.1.100
# Expected: Request timeout
# Move immediately to IPMI, do not spend time on other diagnostics
Step 2: Connect to IPMI and Check Power State (60 seconds)
# Export credentials for the session
export BMC=”192.168.100.50″ # BMC IP, separate from server IP
export IPMI_USER=”admin”
export IPMI_PASS=”yourpassword”
# Verify BMC is responding
ipmitool -H $BMC -U $IPMI_USER -P $IPMI_PASS -I lanplus -C 17 bmc info
# Check chassis power state
ipmitool -H $BMC -U $IPMI_USER -P $IPMI_PASS -I lanplus -C 17 power status
If power status returns “Chassis Power is on,” the server did not crash due to power failure. Proceed to Step 3 to understand why the OS stopped responding.
Step 3: Read the System Event Log (2 minutes)
# Read the SEL with full descriptions
ipmitool -H $BMC -U $IPMI_USER -P $IPMI_PASS -I lanplus -C 17 sel elist
# Save the SEL before any further action
ipmitool -H $BMC -U $IPMI_USER -P $IPMI_PASS -I lanplus -C 17 sel elist \
> /tmp/incident-$(date +%Y%m%d-%H%M%S)-sel.txt
SEL interpretation guide:
| SEL Entry Type | Likely Cause | Next Action |
| Over-temperature critical | Fan failure, HVAC issue, heatsink | Check fan sensor readings, do not restart until root cause found |
| Memory correctable error | DIMM degrading | Restart is safe; schedule DIMM replacement during next maintenance window |
| Memory uncorrectable error | DIMM failed | Do not use server in production; DIMM replacement required |
| Power supply failure | PSU failed | Check if redundant PSU is active; replace failed PSU |
| No entries before crash | Software/OS cause | Proceed to KVM console for kernel panic text |
Step 4: Open KVM Console to View the Screen (3 minutes)
Log into https://[BMC_IP] and launch the remote console. You will see one of these screens:
- Kernel panic with call trace: Read the last function before the panic. Note the timestamp. This is a software or driver issue.
- GRUB menu: The OS failed to mount the root filesystem or a GRUB configuration error occurred. Mount a recovery ISO via virtual media.
- BIOS screen: The server rebooted into BIOS setup. Check boot order.
- Black screen, cursor blinking: The OS hung during boot before reaching the display. Use SOL to see early boot messages.
- Normal login prompt: The OS is running but the application and network are down. The problem may be a networking configuration issue or application crash.
Step 5: Power Cycle and Watch Boot (5 minutes)
# Try a graceful reset first
ipmitool -H $BMC -U $IPMI_USER -P $IPMI_PASS -I lanplus -C 17 power reset
# If reset does not respond within 30 seconds, use hard power cycle
ipmitool -H $BMC -U $IPMI_USER -P $IPMI_PASS -I lanplus -C 17 power cycle
# Connect SOL console to watch the boot sequence
ipmitool -H $BMC -U $IPMI_USER -P $IPMI_PASS -I lanplus -C 17 sol activate
# Press Enter to get output if the console seems idle
# Exit SOL with Ctrl+] or the escape sequence ~ + .
Watch for filesystem errors during boot (fsck output), service startup failures, and network configuration errors. SOL gives you visibility into the boot sequence that KVM cannot provide on headless servers.
Step 6: Document and Escalate Hardware Issues
# If SEL shows hardware errors, open a hardware ticket before returning the server to production
# Clear the SEL after documenting and resolving the root cause
ipmitool -H $BMC -U $IPMI_USER -P $IPMI_PASS -I lanplus -C 17 sel clear
# Verify the SEL is cleared
ipmitool -H $BMC -U $IPMI_USER -P $IPMI_PASS -I lanplus -C 17 sel info
Never clear the SEL without saving it first. The timestamps in a saved SEL log are often the only accurate record of what happened during an incident, and they matter for post-incident analysis and hardware warranty claims.
Συχνές ερωτήσεις
Q: What is IPMI used for?
IPMI (Intelligent Platform Management Interface) is the standard protocol for out-of-band server management. It provides hardware-level access independent of the operating system: power on/off/cycle, hardware sensor monitoring (temperature, fan speed, voltage), System Event Log (SEL) review, KVM remote console access, and Serial over LAN (SOL) text console. IPMI runs on the server’s BMC (Baseboard Management Controller) using standby power, so it stays operational even when the OS crashes or the server is powered off.
Q: What is the difference between IPMI and iDRAC or iLO?
IPMI 2.0 is the industry standard specification. iDRAC (Dell), iLO (HP/HPE), and Supermicro IPMI are vendor implementations built on top of the IPMI standard. Standard ipmitool commands work across all three for core operations: power control, sensor readings, SEL, and SOL. Vendor-specific features, virtual console quality, firmware update workflows, proprietary APIs, require vendor tools like racadm for Dell or the iLO RESTful API for HP.
Q: Is it safe to expose IPMI to the internet?
No. IPMI should never be accessible from the internet. The protocol has known vulnerabilities including cipher 0 authentication bypass and RAKP hash attacks (CVE-2013-4786). Shodan indexes thousands of internet-accessible BMCs with default credentials. Isolate IPMI on a dedicated management VLAN with no internet routing. All access routes through a VPN-connected bastion host.
Q: What is cipher 0 in IPMI and why is it dangerous?
Cipher 0 is an IPMI 2.0 authentication mode that allows any user to log in with any password, including no password at all. Many BMCs shipped with cipher 0 enabled by default. Disable it with: ipmitool -H BMC_IP -U admin -P pass -I lanplus channel setcipher ipmi 1 0 readonly. For all out-of-band connections, specify cipher 17 explicitly with the -C 17 flag.
Q: What is the difference between SOL and KVM console in IPMI?
SOL (Serial over LAN) provides a text-based serial console through the IPMI channel, showing BIOS text output, kernel boot messages, and OS console. It requires serial console configuration in BIOS and the OS bootloader. KVM over IP provides a full graphical session showing the complete server display with keyboard and mouse input. SOL is better for low-bandwidth connections and automated recovery scripts. KVM is better when you need a graphical display or BIOS access on a system without text-mode serial console configured.
Q: Does ipmitool work on Windows?
ipmitool binaries for Windows are available from the ipmitool GitHub project (https://github.com/ipmitool/ipmitool). The core commands work identically to Linux. For in-band access (managing the local server’s BMC), the IPMI kernel driver on Windows is available through the HP OpenIPMI driver or Dell IPMI driver. For most Windows environments, out-of-band access via the web interface is more practical than ipmitool on Windows.
Q: IPMI or Redfish: which should I use for automation?
Both are appropriate depending on context. IPMI and ipmitool work on all server hardware since 2004 and suit single-server operations and quick CLI access. Redfish uses HTTPS REST/JSON, integrates cleanly with infrastructure-as-code tools (Ansible URI, Terraform, Python requests), and is the correct choice for automating large server fleets. Modern servers support both. For Ansible specifically, community.general.ipmi_power works with both IPMI and Redfish-capable BMCs.
Q: Does Atal Networks provide IPMI access on dedicated servers?
Yes. Atal Networks includes full IPMI access on all αποκλειστικός διακομιστής plans. The management interface uses a dedicated out-of-band port separate from your production network. Login credentials are provided at deployment. Our team supports custom VLAN configuration, named user account setup, and multi-server IPMI network architecture for infrastructure teams managing multiple machines. Bare metal infrastructure with full out-of-band control is a core capability of our dedicated server platform.
Get Full IPMI Access on Your Dedicated Server
IPMI access is not a premium add-on, it is a fundamental requirement for any production dedicated server deployment. Without it, a single OS crash forces a support ticket, a wait for a technician, and a recovery that takes hours instead of minutes.
Atal Networks delivers dedicated servers with full IPMI access included on every plan. Dedicated out-of-band management port. Full ipmitool compatibility. KVM over IP. Virtual media for remote OS installation. Immediate access at deployment, not gated behind support tickets.
For infrastructure teams managing multiple bare metal servers, our dedicated server plans support multi-server IPMI VLAN configuration and custom credential management. Contact our team to discuss your out-of-band management requirements before deployment.